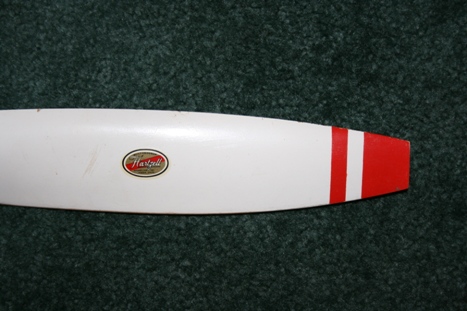
1) Check the prop and balance if required.
2) For larger props 1” and ¼” tape looks pretty good, and for smaller props 3/4” and 1/8” tape look pretty good. You can use masking tape or some type of vinyl tape (the vinyl tape gives a finer line).
3) Start by cleaning the blade tips with rubbing alcohol or something that leaves the surface squeaky clean.
4) Using the larger size tape, place in on the tip of the blade perpendicular to the end.
5) Next, place the smaller tape right next to the larger width tape.
6) Place another piece of smaller width right next to the one you just put in place.
7) Next, place a piece of the wider tape next to that.
8) Now, remove the wider width at the tip and the second piece of thinner tape.
9) Lightly sand the 1” and ¼” exposed area with 400 grit or similar sanding paper.
10) Do the same to the other prop tip.
11) Mask off in between the areas to be sprayed.
12) Using Krylon or similar fast drying paint, color of your choice (white, red or yellow show up well), spray a light coat on the exposed areas, when this coat is tacky, spray a final coat attaining a glossy wet look.
13) Remove the tape that was left in place before the paint dries and set the prop aside to dry.
14) Now, check the balance again and you are good to go.
If you decide to go further and paint the entire prop, lightly sand the entire prop and then paint the face of the prop (the face of the prop is the side of the prop that the pilot sees when setting in the cockpit) flat black. The airfoil side of the prop is usually dove gray, white or can be a color that matches your airplane. Once the entire prop is painted you can add prop manufacture decals and then paint the tips as listed above. To balance the prop, if required, spray flat black paint on the light side of the prop and then re-check balance.

